User’s Manual Automatic ultrasonic cleanen for record in both sides
User 『s Manual
Everyone:
When you are correctly using your vinyl record, there may be some dust on the surface of the record. You can use brush or lint-free cloth to clean it. However, fingerprint and stubborn dust particles, can only be done by professional cleaning machines.
RW-600 automatic fine cotton roller vinyl cleaning machine, is a gentle and soft, wet cleaning machine.It uses microfiber cleaning roller and ultrasonic vibration of the liquid counter-rotating.Followed wipers and wind drying, all done through automatic under microcomputer control.And to ensure that the effect of vinyl records and sound quality, and protection from dust-related damage record.
A. Equipment Device Overview
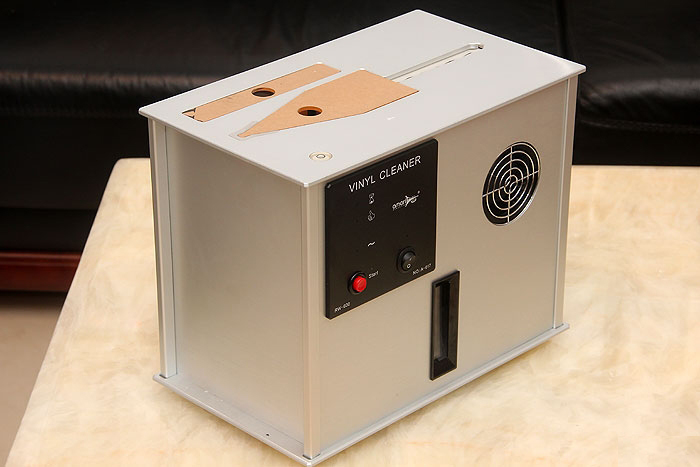
Picture 1:

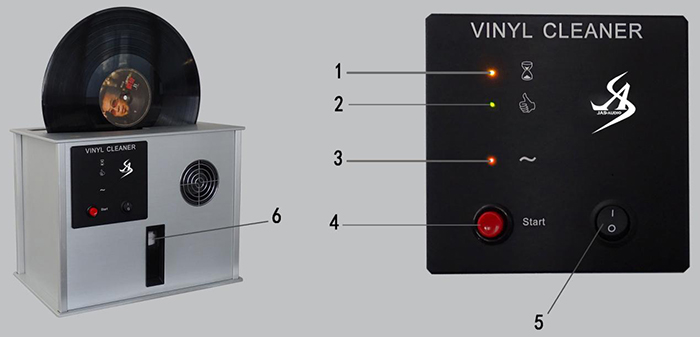
[No. 1]: The yellow LED is lights, the cleaning operation is in progress.
[No. 2]: When the green LED is lighted, the Equipment is ready, or finishing cleaning, the vinyl can be removed. It can be placed next vinyl, ready to clean!
[No. 3]: Red LED indicator lights, yellow LED lights and the green LED is not lighted. The cleaning process can not be started. Cleaning fluid too little, the water level switch is low, add distilled water or purified water until the red LED light goes out, the green LED indicator lights.
[No. 4]: Red Start button to start the cleaning process, the yellow LED indicator lights. (Prerequisite: green LED is lit)
[No. 5] :: main switch operation display.
When in the ON position, turn on the display, yellow LED indicator lights on the switch lights.
When the OFF position, turn off the display, switch on the yellow LED goes out.
(1) Picture 2:

(2) [No. 6]: water level display. Before cleaning, the water level float switch contact upper level switch top.
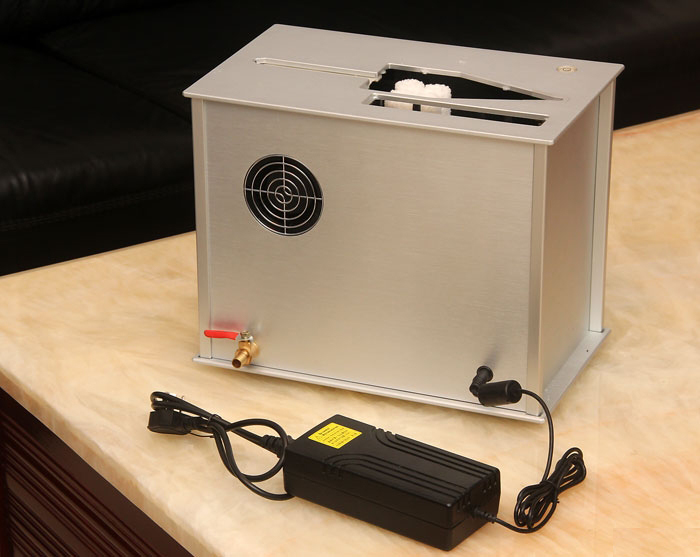
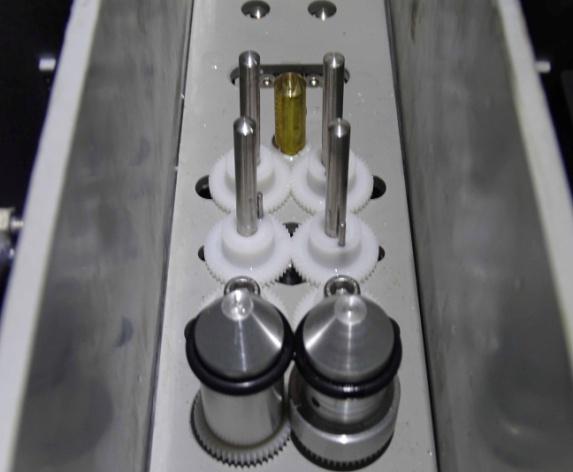
(3) Picture 3:
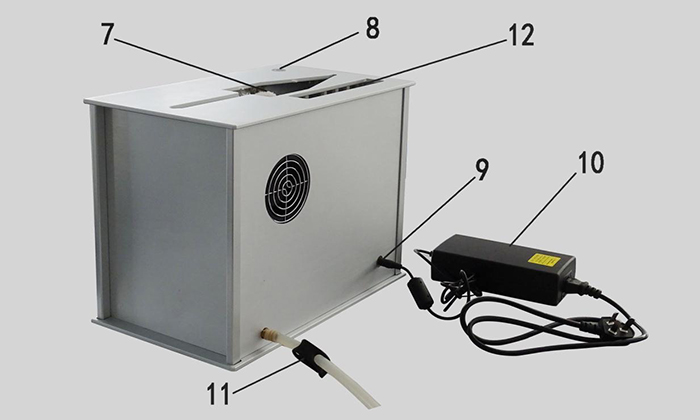
[No. 7]: Ultra thin cotton cleaning roller
[No. 8]: Levels
[No. 9]: Device power outlet (center positive voltage DC 24 V)
[No. 10]: power adapter input voltage: AC100V ~ 240V, output voltage: DC24V, DC: 8.25A
[No. 11]: wastewater discharge valve.
[No. 12]: Clean the filter with a sponge and cover.
B. Cleaning preparations before equipment
(1) Vinyl washing machine placed on a horizontal table, observe the level of beads bubble is in the center position, or at least should be allowed to adjust the level of the outer circle mark bubble contact.
(2) Picture 8: Picture 9:
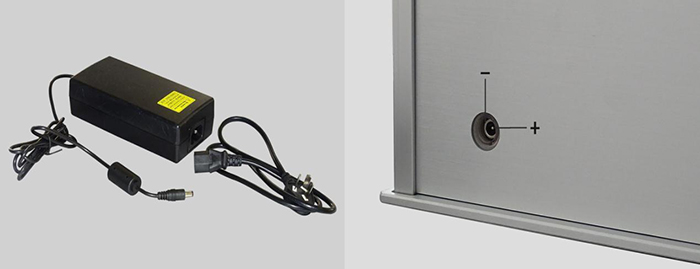
(3) Inser the power supply in picture 8 into the power outlet hole in picture 9
Picture 1:
(4) Turn the No.5 switch in picture 1 to on, then the yellow LED in No.5 lights up, the red LED in No.3 lights up.
Picture 3:

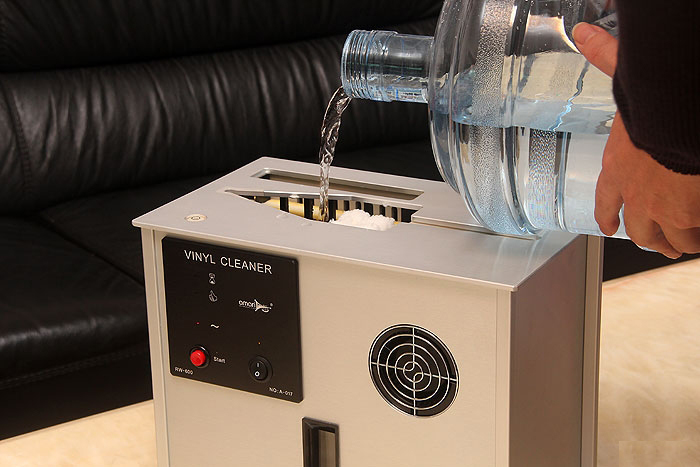
(5) [No. 12]Remove the cover, first take out the filtration sponge, adding 20 ~ 29ml concentrate discography professional cleaning liquid, then add 4.5 liters of distilled water or purified water, observed picture 1 [No. 6] water level switch float position and a position close to the upper level switch when, when the green LED lights, water height to meet the requirements of the machine! Replace the filter with a sponge, close the lid.
Picture 1:

Press [No. 4], the red button starts, the yellow LED lights, to simulate a cycle of automatic operation, about 6 minutes. When the green LDE lights, wind woo is sounded, simulation of a wash cycle is complete!
In this case, equipment is ready before cleaning.
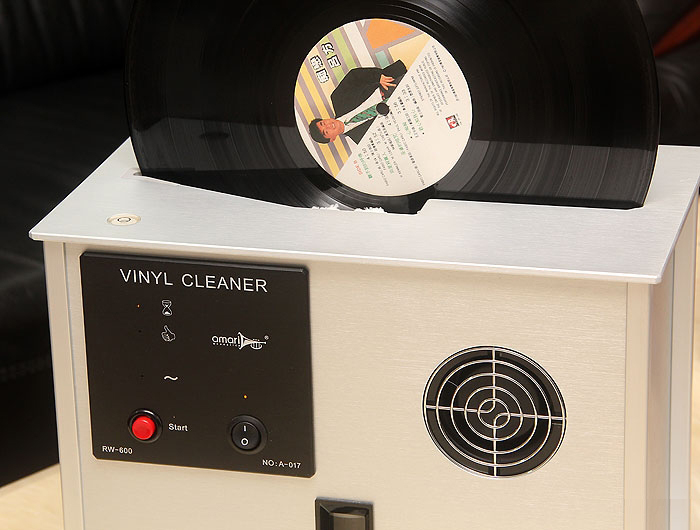
C. Cleaning vinyl records
In normal operations, as long as you prepare perfect machine (green LED lights) to opens, and then into the vinyl records, press the red start buttons, all automatically. When the cleaning operations, the yellow LED indicator lights
When the green LED lightss, wind woo is sounded, a cleaning cycle is complete, remove the labels! Then the next cleaning cycle!
Add vinyl ——-
D. Replace the cleaning fluid
When cleaning about 100 records, cleaning water has been dirty. Do not use it again, it needs to be replaced.
Picture 3, No. 11 wastewater discharge valves open and release water! Then use distilled water or purified water tank cleaning equipment section twice. Wastewater discharge valve closed again, carry out preparatory work before the program —- reference B.
E. Maintenance/accessories
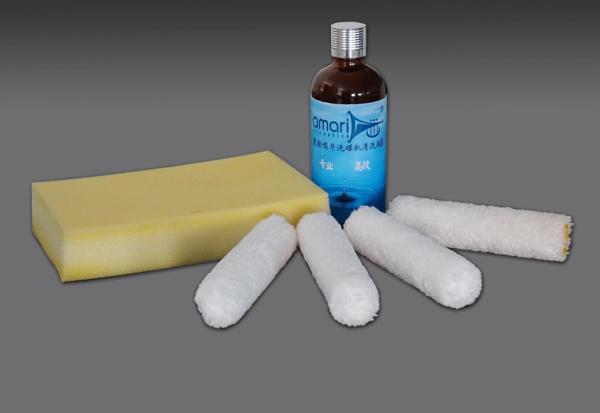
(1) After about 500 albums are cleaned, you need to replace the four Microfiber – cleaning roller. Simply pull up the cleaning rollers, put the new cleaning rollers, gently push down, and then turn a littles, until the drive pegs into the holes and clean the drum roll completely in the end so far.
Picture 5:
Picture 6:
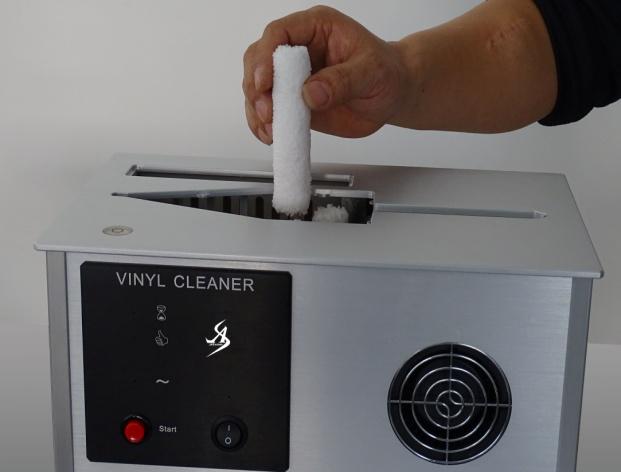
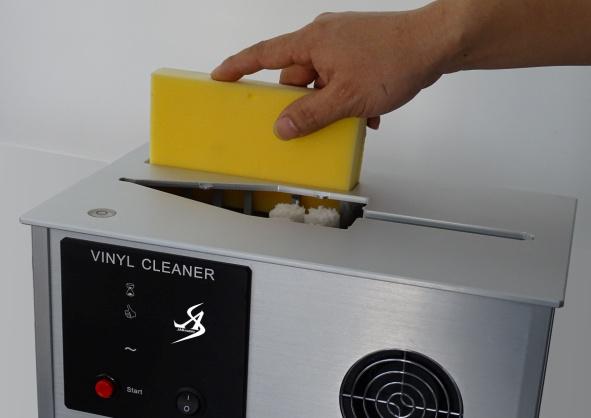
(2) Filter sponge cleaning
After cleaning about 100 vinyl records, you need to clean. The sponge filter repeatedly immersed in distilled water or purified waters, and kept pressing.
Picture 7:
picture 10:
Then reinsert the filter position from the top, and slide it to the bottom. Then close the lid.
(3) The vinyl cleaning equipment, is only for cleaning records in 12 inches diameter.(300mm diameter)
(4) Only original cleaning fluid can be used, other cleaning agents can cause damage to the equipment, devices and labelss, any harsh, corrosive acidic cleaners or alcohol will damage Equipment. If you use a third-party cleaners, warranty!
(5) For external Equipment, to clean with a soft cloth and mild detergent is sufficient.
F. Specifications:
(1) Power
Input voltage: AC100 ~ 240V, 50 ~ 60HZ
Output voltage: DC + 24V (center axis is positive)
Power: 70VA
(2) water capacity
Distilled water or purified water: 4500mL
Cleaning Concentrate: 20ml
(3) Cleaning Time
About 6 minutes
(4) clean record size
Only clean record 12 inches (diameter 300mm)
(5) Weight and Dimensions
When no liquid weight: 9.6KG
Length x width x height: 340x205x270 mm
(6) Warranty
1 year from date of purchase.
power supply:
Input voltage: AC100 ~ 240V, 50 ~ 60HZ
Output voltage: DC + 24V (center axis is positive)
Because air traffic control,Packaging inside without cleaning fluid ,sorry.
|